
 8
8
The following Steps show how to create and place a digital e-signature in Foxit Reader.
For creating the signature for Digital ID.
(if one is already created, skip to next part "To Place Digital ID")
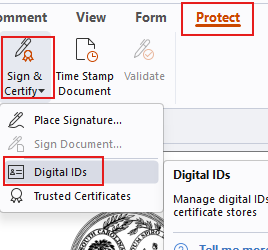
1. In Foxit, click Protect at the top. Click Sign & Certify. Click Digital IDs.
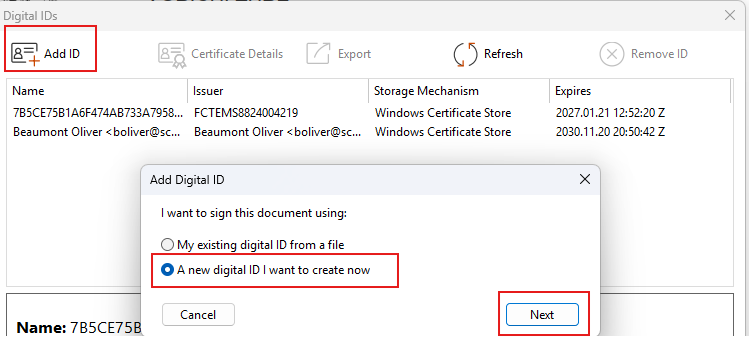
2. In the New window, click Add ID at the top and then choose "A new digital ID I want to create now". Click Next.
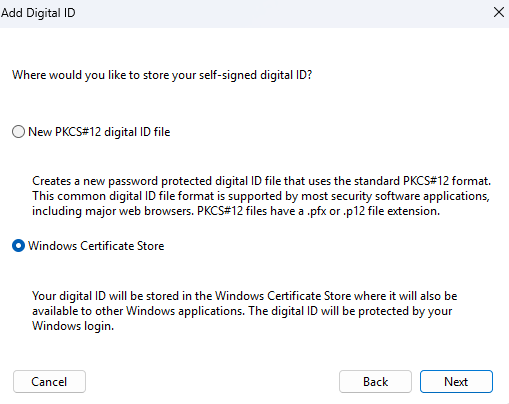
3. In the next window, click Windows Certificate Store. Click Next.
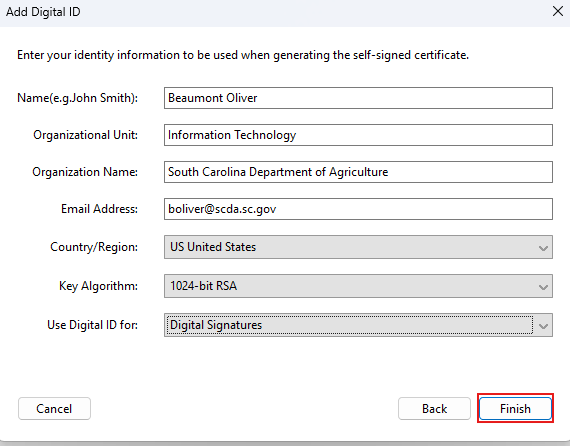
4. In this window, fill out your information then click Finish.
Keep in mind, yours will look different then the example below in terms of your name, Organization unit, and Email. The only things that should be the same as picture below is Organization Name, Country/Region, Key Algorithm, and Use Digital ID For.
(Example)
Your digital ID is now created.
To place your Digital ID
In some cases. PDFs will have an embedded signature fields that you can simply click and add the signature from your Digital ID file. It may look like the below.
1. Simply click the purple signature field.

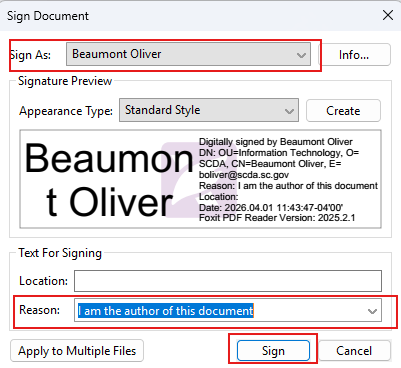
2. In the signature box, make sure your ID is selected for Sign As. (It will usually default to your Digital ID you created). Make sure you change the Reason to the proper option. Author, reviewing, etc. Then click Sign.
3. The document will then require you to save a copy. After saving the copy, the PDF is now ready to send off.
For placing a signature where the PDF does not have an embedded signature box.
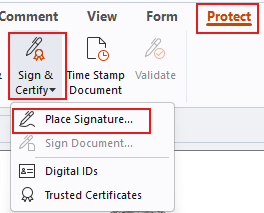
1. If there is no signature box to click. Simply navigate to Protect, click Sign & Certify, then click Place Signature.
2. Your mouse will change to a cross. Simply click and drag a box across a signature box you want to sign. The signature function will pop up like in Step 2 above.
3. Make sure the fields are correct and click Sign. Same as Step 2 picture above, but this time it will ask page range. Usually just keep this default if you are placing a single signature.
4. The document will then require you to save a copy. After saving the copy, the PDF is now ready to send off.

